Introduction
Prisma ORM has been gaining a lot of attention in the developer community. And for a good reason: Prisma makes it easy to create database schema, keeping it up-to-date with changes in your application’s data model.
This blog post will show you how to get started with Prisma ORM and how easy it is to use.
What is Prisma?
Prisma is an open source ORM (Object Relational Mapper) for Node.js. It supports both JavaScript and TypeScript. It really excels when using TypeScript, helping you write both readable and type-safe code.
Why Prisma?
Schemas help developers avoid data inconsistency issues over time. While you can define a schema at the database level within MongoDB, Prisma lets you define a schema at the application level. When using the Prisma Client, a developer also gets the aid of auto-completing queries, since Prisma Client is aware of the DB schema.
Overview
In this article, we will learn on how to implement a basic schema in the MongoDB table with Prisma.
MongoDB Setup
I will be using a free shared instance of MongoDB Atlas. You can also connect it to your already existing instance of MongoDB. To create a free MongoDB instance, signup on this link.
Once you create a cluster, answer the security questions to add a new user with a password. After the setup is ready, Click on Connect button on the cluster card and select the option which says Connect your application and copy the connection string.
Your connection string would look something like this. You might need to add your database name at the end before query parameters. If you don't have any database, you can add any name you prefer, prisma would create it for you.
mongodb+srv://myuser:[email protected]/mydatabasename?retryWrites=true&w=majority
With the connection string, our work on the MongoDB website is complete and we can now start with Prisma initialization.
Prisma basics and schema
Prisma is a server-side library that helps developers read and write data to the database in an intuitive, efficient, and safe way.
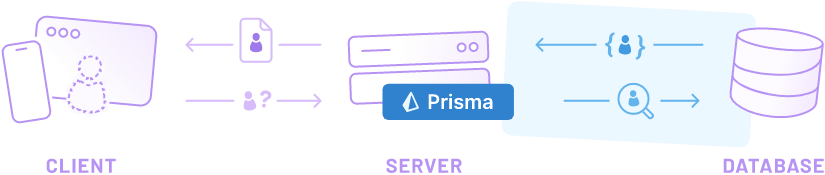 You can manage your data model, migrations and it also offers a Prisma client which aids you with type checking while writing code. It also comes with Prisma studio which is a GUI tool to explore and manipulate your data in all of your Prisma projects.
Prisma relies on schema.prisma file in your project where you define your schema.
We can initiate Prisma in our project by using these commands in case of a javascript project.
npm install prisma --save-dev
npx prisma init
In the case of typescript:
npm install prisma typescript ts-node @types/node --save-dev
npx prisma init
The output would look something like the below in both the cases:
 Shell output for
 npx prisma init
Next, create a tsconfig.json file in the root and add the following configuration to it:
tsconfig.json (typescript only)
{
  "compilerOptions": {
    "sourceMap": true,
    "outDir": "dist",
    "strict": true,
    "lib": ["esnext"],
    "esModuleInterop": true
  }
}
These commands would do the following things:
- Install all Prisma packages
- create a new directory called
prismathat contains a file calledschema.prisma, which contains the Prisma schema with your database connection variable and schema models - creates the
.envfile in the root directory of the project, which is used for defining environment variables (such as your database connection)
Configure .env variables
Now open the .env file, there would be a variable named DATABASE_URL. Please paste the connecting string generated during the MongoDB setup step here.
DATABASE_URL="mongodb+srv://myuser:[email protected]/mydatabasename?retryWrites=true&w=majority".env
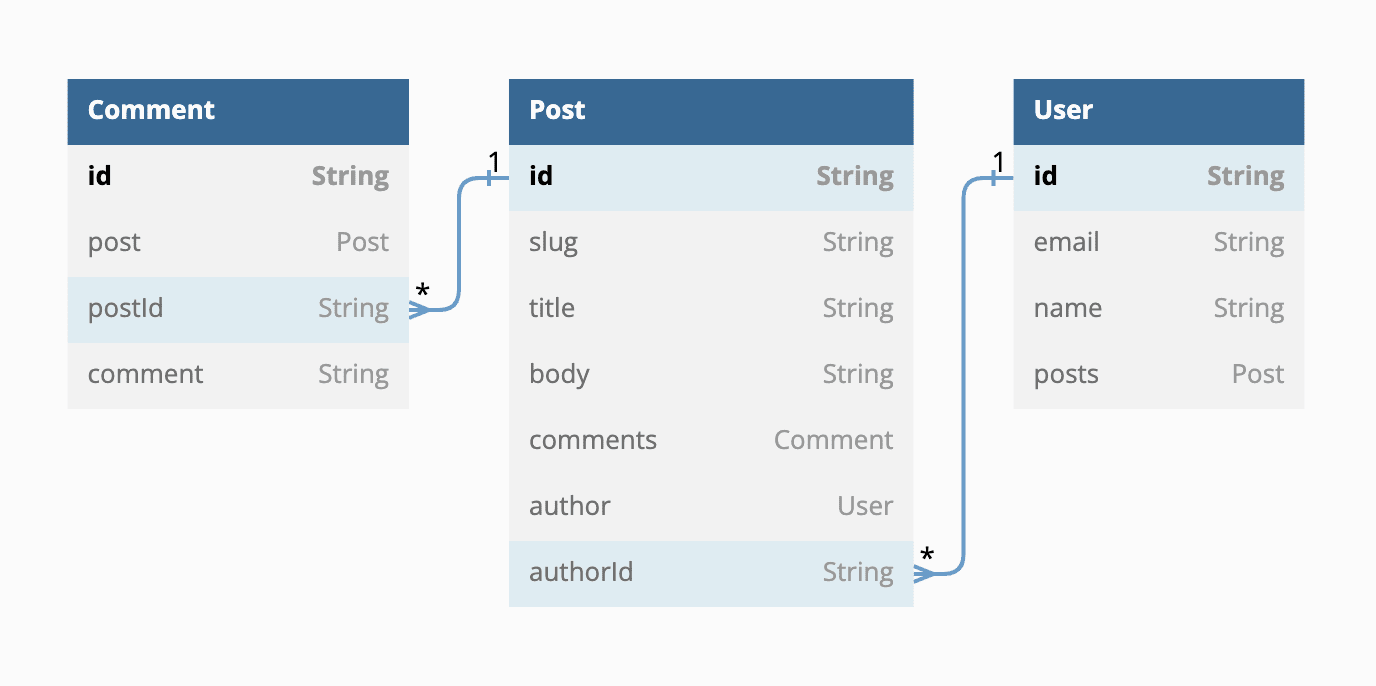
We have all the pre steps ready for Prisma. Now we will move on to write a basic schema of Post-Comment-User model. Here is a diagram explaining the schema we are going to build.
 To implement this structure, in your
 schema.prisma file, do this:
generator client {
  provider = "prisma-client-js"
}

datasource db {
  provider = "mongodb"
  url      = env("DATABASE_URL")
}

model Post {
  id       String    @id @default(auto()) @map("_id") @db.ObjectId
  slug     String    @unique
  title    String
  body     String
  comments Comment[]
  author   User      @relation(fields: [authorId], references: [id])
  authorId String    @db.ObjectId
}

model Comment {
  id      String @id @default(auto()) @map("_id") @db.ObjectId
  post    Post   @relation(fields: [postId], references: [id])
  postId  String @db.ObjectId
  comment String
}

model User {
  id    String  @id @default(auto()) @map("_id") @db.ObjectId
  email String  @unique
  name  String?
  posts Post[]
}
The first two blocks define Prisma's settings for MongoDB. It picks up the database URL from the .env file above.
The @id attribute is used to define an ID key in MongoDB which is usually _id in database and since Prisma does not use underscores, we use @map to map it with _id.
You can read more about all the attributes available in Prisma.
@relation defines the relation between two tables based on fields. It can be of multiple types like one to one, one to many and many to many. Here fields define the field from the current table and references point to the key to reference to from the related table. Learn more about relations.
Install and generate Prisma Client
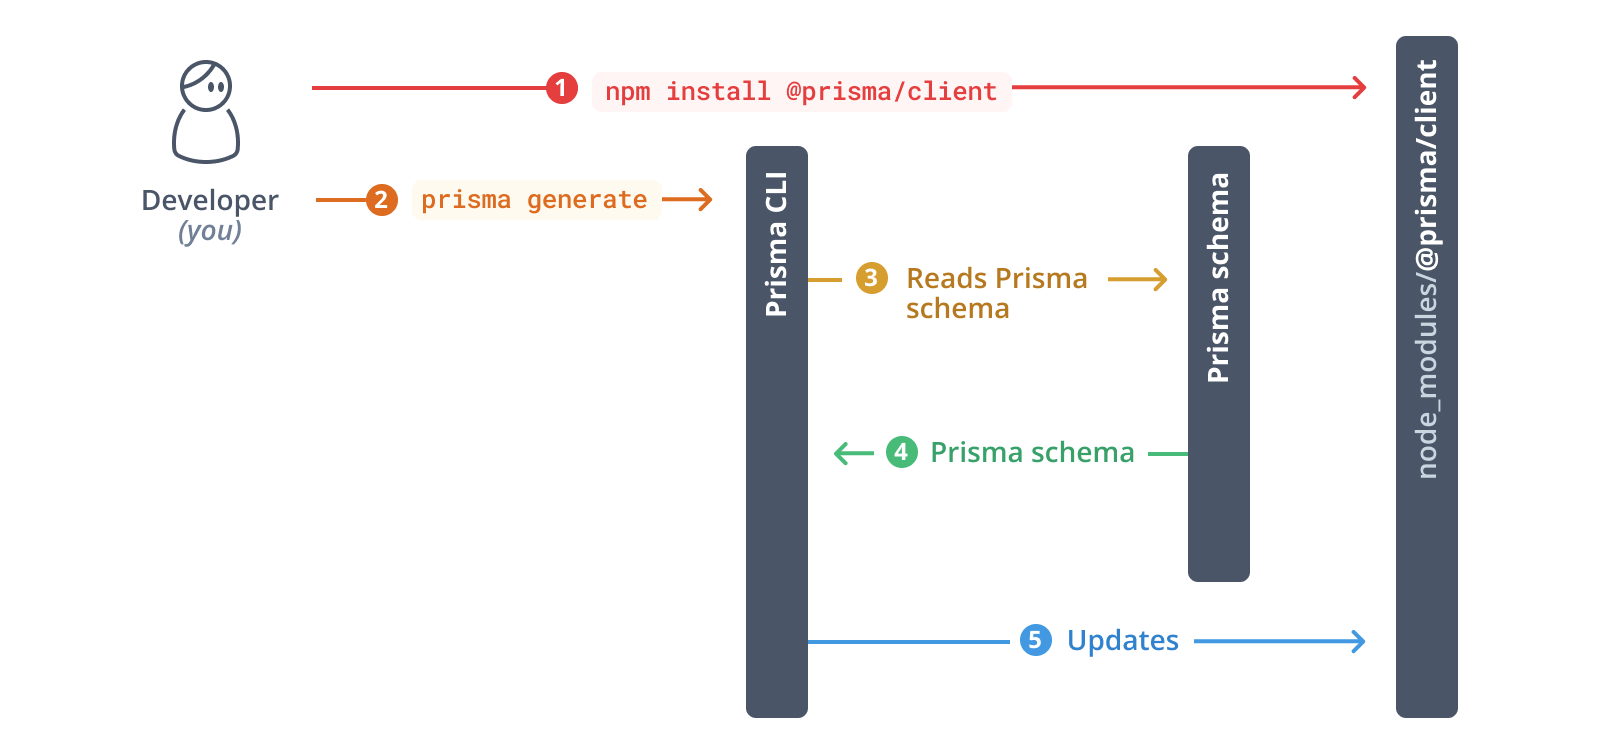
To get started with Prisma Client, you need to install the @prisma/client package:
npm install @prisma/clientNotice that the install command automatically invokes prisma generate for you which reads your Prisma schema and generates a version of Prisma Client that is tailored to your models.
 Whenever you make changes to your Prisma schema in the future, you manually need to invoke
 prisma generate in order to accommodate the changes in your Prisma Client API.
After adding the schema, run the following command to help the Prisma client detect the changes:
npx prisma generateWhenever you make changes to your Prisma schema in the future, you manually need to invoke prisma generate in order to accommodate the changes in your Prisma Client API.
Let's jump into implementation with NodeJS now. The part above would be common in all the implementations and we would be referencing it below.
Implementation in NodeJS
Start by following the MongoDB setup and Prisma setup instructions above.
Javascript
Create an index.js file in the root of the project and write the following to initialize the connection.
const { PrismaClient } = require('@prisma/client');

const prisma = new PrismaClient();

async function main() {
  // Connect the client
  await prisma.$connect();
  // ... our Prisma client queries would go here.
}

main()
  .then(async () => {
    await prisma.$disconnect();
  })
  .catch(async (e) => {
    console.error(e);
    await prisma.$disconnect();
    process.exit(1);
  })
Typescript
Create an index.ts file in the root of the project and write the following to initialize the connection.
import { PrismaClient } from '@prisma/client';

const prisma = new PrismaClient();

async function main() {
  // Connect the client
  await prisma.$connect();
  // ... our Prisma client queries would go here.
}

main()
  .then(async () => {
    await prisma.$disconnect();
  })
  .catch(async (e) => {
    console.error(e);
    await prisma.$disconnect();
    process.exit(1);
  })
Here's a quick overview of the different parts of the code snippet:
- Import the
PrismaClientconstructor from the@prisma/clientnode module - Instantiate
PrismaClient - Define an
asyncfunction namedmainto send queries to the database - Connect to the database
- Call the
mainfunction - Close the database connections when the script terminates
You can configure the above code as per your project so that it runs only once when the app starts and closes the connection on app shutdown.
Inside the main function, we will add all the queries to perform CRUD operations.
READ
async function main() {
  // Connect the client
  await prisma.$connect();
  // ... our Prisma client queries would go here.
  const allUsers = await prisma.user.findMany();
  console.log(allUsers);
}
When running the application using node index.js or npx ts-node index.ts in the case of typescript, this should print an empty array because there are no User records in the database yet:
[]findMany returns the list of all records in the User table. You can find all the model queries.
CREATE
We will learn how to write a query to write new records into the Post, User and Comment tables.
Adjust the main function to send a create query to the database:
async function main() {
  await prisma.$connect();

  await prisma.user.create({
    data: {
      name: 'Deepinder',
      email: '[email protected]',
      posts: {
        create: {
          title: 'My first post',
          body: 'Interesting blog stuff',
          slug: 'my-first-post',
        },
      },
    },
  });

  const allUsers = await prisma.user.findMany({
    include: {
      posts: true,
    },
  });
  console.dir(allUsers, { depth: null });
}
This code creates a new User record together with a new Post using a nested write query. The User record is connected to the other one via the Post.author ↔ User.postsrelation fields respectively.
Notice that we're passing the include option to *findMany* which tells Prisma Client to include the posts relations on the returned User objects.
After running the above, the output should look similar to this:
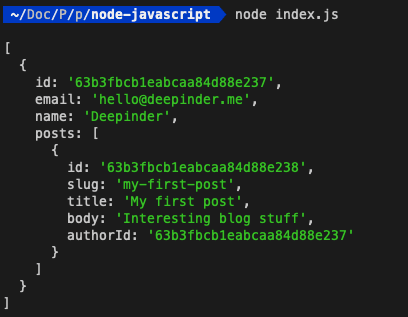 Created user printed on console
As talked above about visualization tool Prisma Studio, we can see all the above data on a GUI by running the following command:
Created user printed on console
As talked above about visualization tool Prisma Studio, we can see all the above data on a GUI by running the following command:
npx prisma studioThe above command would open up a GUI on a web browser and would look similar to this with the User and post entry above.
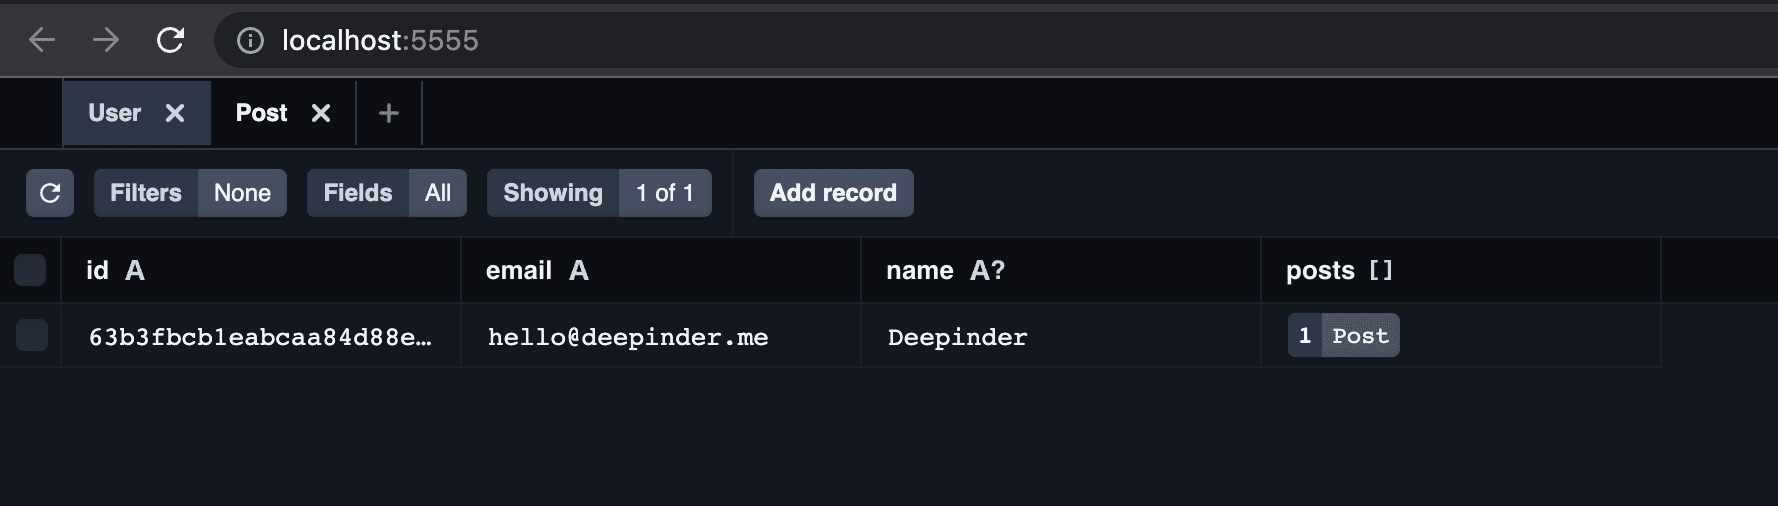 Prisma Studio GUI
UPDATE
Prisma Studio GUI
UPDATE
async function main() {
  await prisma.$connect();

  await prisma.post.update({
    where: {
      slug: 'my-first-post',
    },
    data: {
      comments: {
        createMany: {
          data: [
            { comment: "Amazing post!" },
            { comment: "Can't wait to read more of these!" },
          ],
        },
      },
    },
  });
  const posts = await prisma.post.findMany({
    include: {
      comments: true,
    },
  });

  console.dir(posts, { depth: Infinity });
}
The output of the above code would look similar to this:
 UPDATE command with newly created comments
It creates the new comments with the relation to post using the UPDATE query.
UPDATE command with newly created comments
It creates the new comments with the relation to post using the UPDATE query.
DELETE
We can also delete a record like this.
async function main() {
  await prisma.$connect();

  await prisma.comment.delete({
    where: {
      id: "63b3fdd797879fac42a03b76",
    },
  });
  const comments = await prisma.comment.findMany();

  console.log(comments);
}
It would delete the first record with the comment string 'Amazing post!'
If you want to delete a record with relation, you can read more about Cascading deletes.
All the code above can be found on my github.
Liked my work. Buy me a coffee.
Do write down your reviews or send in a mail from the contact form if you have any doubts and do remember to subscribe for more content like this.