This is one of those topics for which you will rarely find resources on the web. How to make your emoji picker? Where to find the emojis? How to find cross-OS support as every OS has its own emoji pack?
Well, Twitter to the rescue. Twitter’s open-source emoji has you covered for all your project’s emoji needs. You can use and make the same emoji picker which Twitter uses for their emoji needs.
Let’s start making it then. Twitter offers a twemoji module on npm which can be used to render the emoji from Unicode and display on your page, but as we have to make a picker it will be having a lot of emojis so its not a good practice to load them all by sending too many requests to the server, instead we use way to load them all at once in single file. This approach is called making a **sprite** of the images and you might have heard of CSS Sprites in the past but today we will do it with SVG’s.
Although there are more than 3000 of emojis on the twitter repo but I managed to filter few hundreds of them and categorize them in their types and used a module like svg-sprite to combine them and make a sprite sheet out of them. svg-sprite helps in making a sprite with each image having its id attribute and even offers many more features of specifying the width, height and various other options.
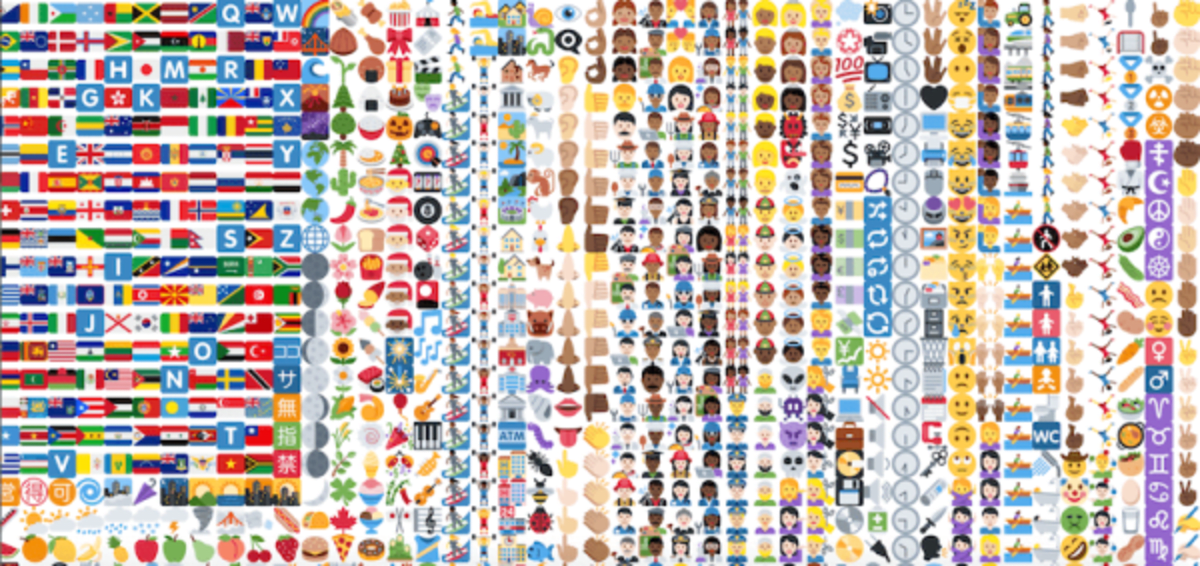 If you still wonder what is a sprite, I will show you a screenshot of how that looks.
In CSS these sprites are used in the background image by specifying their position in the image, the same can be done with SVG too, but we will use a better approach that “Inline SVG” has to offer. We can
If you still wonder what is a sprite, I will show you a screenshot of how that looks.
In CSS these sprites are used in the background image by specifying their position in the image, the same can be done with SVG too, but we will use a better approach that “Inline SVG” has to offer. We can <use> in <svg> element to reference the emojis from the sprite sheet mentioned the svg sprite has an id attribute on each image which we can refer to.
Let’s implement this with React. I will create a project using create-react-app.
I have combined all the emojis into a JSON file with their names and Unicode so that it makes us easy to iterate and display them with their categories.
We will divide the picker into 2 sections, header and body.
Let’s make the UI and functionality. Go to your JSX file and do the following.
import React, { useState } from 'react';
import './App.css';
import json from "./emojis.json";

function App() {
  const [emojiIndex, setEmojiIndex] = useState(0);
  /**
   * Create the heading bar
   */
  function createSvgHeading() {
    return json.map((item, index) =>
      <button className="emoji-panel__btn"
        key={index}
      onClick={()=> setEmojiIndex(index)}>
        {createSvg(item.unicode, item.name)}
      </button>
    )
  }
  return (
    <div className="emoji-panel">
      <div className="emoji-panel__heading">
        {createSvgHeading()}
      </div>
      <div className="emoji-panel__body">
        {createSvgBody(emojiIndex)}
      </div>
    </div>
  );
}

/**
 * Create svg body where all the emojis come
 * @param {} index
 */
function createSvgBody(index) {
  return json[index].emojis.map((item, index) =>
    <button
        className="emoji-panel__btn"
        key={index}
    onClick={()=> onEmojiSelect(item)}>
      {createSvg(item.unicode, item.title)}
    </button>
  )
}
/**
 * Creating a svg
 * @param {*} unicode
 * @param {*} title
 */
function createSvg(unicode, title) {
  return (
    <svg width="25" height="25">
      <use href={`/sprite.svg#${unicode}`}>
        <title>{title}</title>
      </use>
    </svg>)
}

/**
 * function called when an emoji is selected,
 * it returns the object which contains name
 * and unicode.
 * @param {*} item
 */
function onEmojiSelect(item) {
  console.log(item);
}

export default App;.emoji-panel{
background-color: #fff;
box-shadow: 0 4px 4px 0 rgba(0,0,0,.06);
width: 400px;
}
.emoji-panel__heading{
background-color: #f0f0f0;
display: flex;
justify-content: space-between;
}
.emoji-panel__body{
max-height: 300px;
overflow: auto;
}
.emoji-panel__btn{
background: none;
border: none;
cursor: pointer;
padding-top: 0.5rem;
padding-bottom: 0.5rem;
transition: all 0.2s;
}
.emoji-panel__btn:hover{
transform: scale(1.2,1.2);
}Here we create the panel and add the heading and body, we have imported the emojis JSON from JSON file and looped through it to create the heading and the body.
We have a createSvg() function to create the HTML for the svg.
function createSvg(unicode, title) {
return (
  <svg width="25" height="25">
    <use href={`/sprite.svg#${unicode}`}>
      <title>{title}</title>
    </use>
  </svg>)
}
We create a svg element with the use element of svg which is used to refer and render the svg from the sprite. We refer to the sprite in the initials of href before the hashtag “sprite.svg#” and enter the id of the element which is given in the sprite which is Unicode in our case in the second part. Title just act as a title for the element when hovered. We also a click listener on the emojis in the header to update the index and re-render the body associated with that category. Whenever an emoji from the body is selected we attach a listener to fetch the object of the emoji which was selected and that emoji shows the name and Unicode which can be used further for your usage.
Sprite SVG is placed in the public folder in the project. You can find the sprite.svg file in the GitHub repository for react-twemoji.
The “char” key in the object contains the emoji. Although it would show as rendered in the code block below but it actually contains the code to display and send that emoji to others.
{
  "name": "smiling face with sunglasses",
  "unicode": "1f60e",
  "char": "😎"
}
I have implemented basic css for this panel which can be found in the gist above.
The JSON file also contains the names, if you want to implement the search functionality with your panel/picker.
After implementing the steps above you would a working emoji picker looking like this on your app.
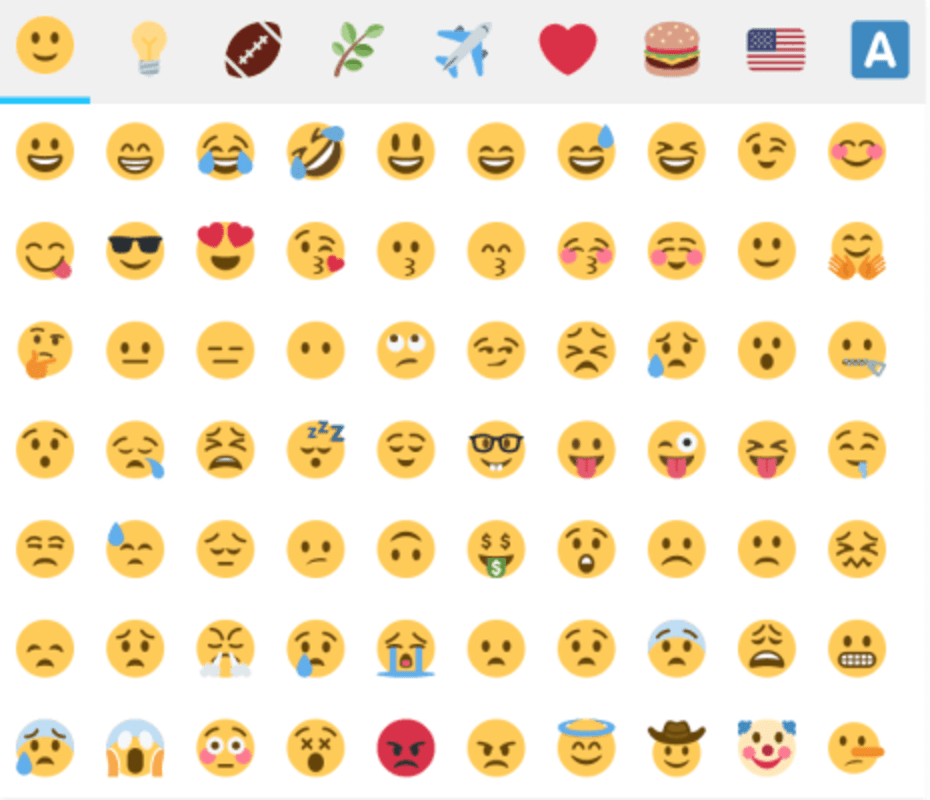 Our Custom Emoji Picker — Looks same as twitter
There we go we have a working emoji picker made with these simple lines of code and it returns us the emoji that is clicked with the data.
Our Custom Emoji Picker — Looks same as twitter
There we go we have a working emoji picker made with these simple lines of code and it returns us the emoji that is clicked with the data.
You can check all of the above written example code at my github.
This concludes my article on creating an Emoji Picker like Twitter in React. In the next part we will learn how to render the emoji as Twemoji from Unicode using the Twemoji module when we have a Unicode and we want an emoji rendered from that.
Do write down your reviews.
Liked my work. Buy me a coffee.
Do write down your reviews or send in a mail from the contact form if you have any doubts and do remember to subscribe for more content like this.