This article is a continuation of the series on creating a real-time chat application with Angular, Socket.io, and Node.js. If you haven't read Part 1 yet, it's recommended to do so first to understand the context of this article.
Introduction to Rooms
We introduce a new term called rooms. A room in socket.io is a random channel that sockets can join and leave. It can be used to broadcast events to a subset of clients/users. But, the concept of rooms is only available on the server(i.e. the client does not have access to the list of rooms it has joined).
What we will use the room for?
We will be using the rooms for connecting multiple users to talk to each other by joining a room made from their user id or a room for a topic(say some office event, football scores, etc) where we don't want to broadcast it to everybody, just allow the subscribed people to listen to it and receive messages for that particular event.
How will the two users communicate?
In a chat application we always have user ids for every user whether there's a channel between 2 users(one-to-one) or 100 users, they will always have a channel id and user id of users which would always be unique. We will use a unique user id to be a contender for our room name.
Firstly, we need to fetch the user id from the client side. The user can be authenticated with the token that we saw in our previous article. So, we will extract the information on the backend from the token or JWT(whichever way you prefer) and this adds a layer of security to our application so that only authenticated users can connect.
I will be using an input on the top of my page to enter a token which will be a JWT in my case. You can have the token in your app whichever way you like, and you might also have an app in production that would have already stored the token in local storage or cookies.
Authentication token as input
Let's start by creating the input field for receiving the token. Go to app.component.html file and remove all the Angular boilerplate code inside and paste the following code.
<div class="App">
  <form [formGroup="tokenForm" (submit="submitToken()">
    <input type="text" placeholder="Enter token" formControlName="token" />
    <button type="submit">Submit</button>
  </form>
</div>
In app.component.ts file
import { SocketioService } from "./socketio.service";
import { Component, OnInit } from "@angular/core";
import { FormBuilder } from "@angular/forms";

@Component({
  selector: "app-root",
  templateUrl: "./app.component.html",
  styleUrls: ["./app.component.scss"],
})
export class AppComponent implements OnInit {
  title = "socketio-angular";

  tokenForm = this.formBuilder.group({
    token: "",
  });

  constructor(
    private socketService: SocketioService,
    private formBuilder: FormBuilder
  ) {}

  ngOnInit() {}

  submitToken() {
    const token = this.tokenForm.get("token").value;
    if (token) {
      this.socketService.setupSocketConnection(token);
    }
  }

  ngOnDestroy() {
    this.socketService.disconnect();
  }
}
We create a form builder and bind the form group to the html element and take the token input on submit and initiate the socket connection.
To make the forms run we need to import the ReactiveFormsModule in app.module.ts file
import { ReactiveFormsModule } from '@angular/forms';

imports: [
  BrowserModule,
  ReactiveFormsModule
]
In the imports array, add ReactiveFormsModule Since, I will be authenticating with the user token and that token will be passed by an input, I will call my setupSocketConnection method on submitting the token input form. An if statement is added to prevent initial case of empty token.
We will handle the backend socketio middleware further which will verify the token.
In out socket.service.js file, handle the token param in setup method
setupSocketConnection(token: string) {
  this.socket = io(environment.SOCKET_ENDPOINT, {
    auth: {
      token
    }
  });
}
Following the previous article we will pass the token in auth and change the static 'cde' to the token passed in by the UI input.
Token Generation
Let's generate a random token from jwt.io. I will add an id parameter here and a myRandomHash secret to sign it. Remember that this token is only for this article's explanation, in real world scenario you might already have a token in your app.
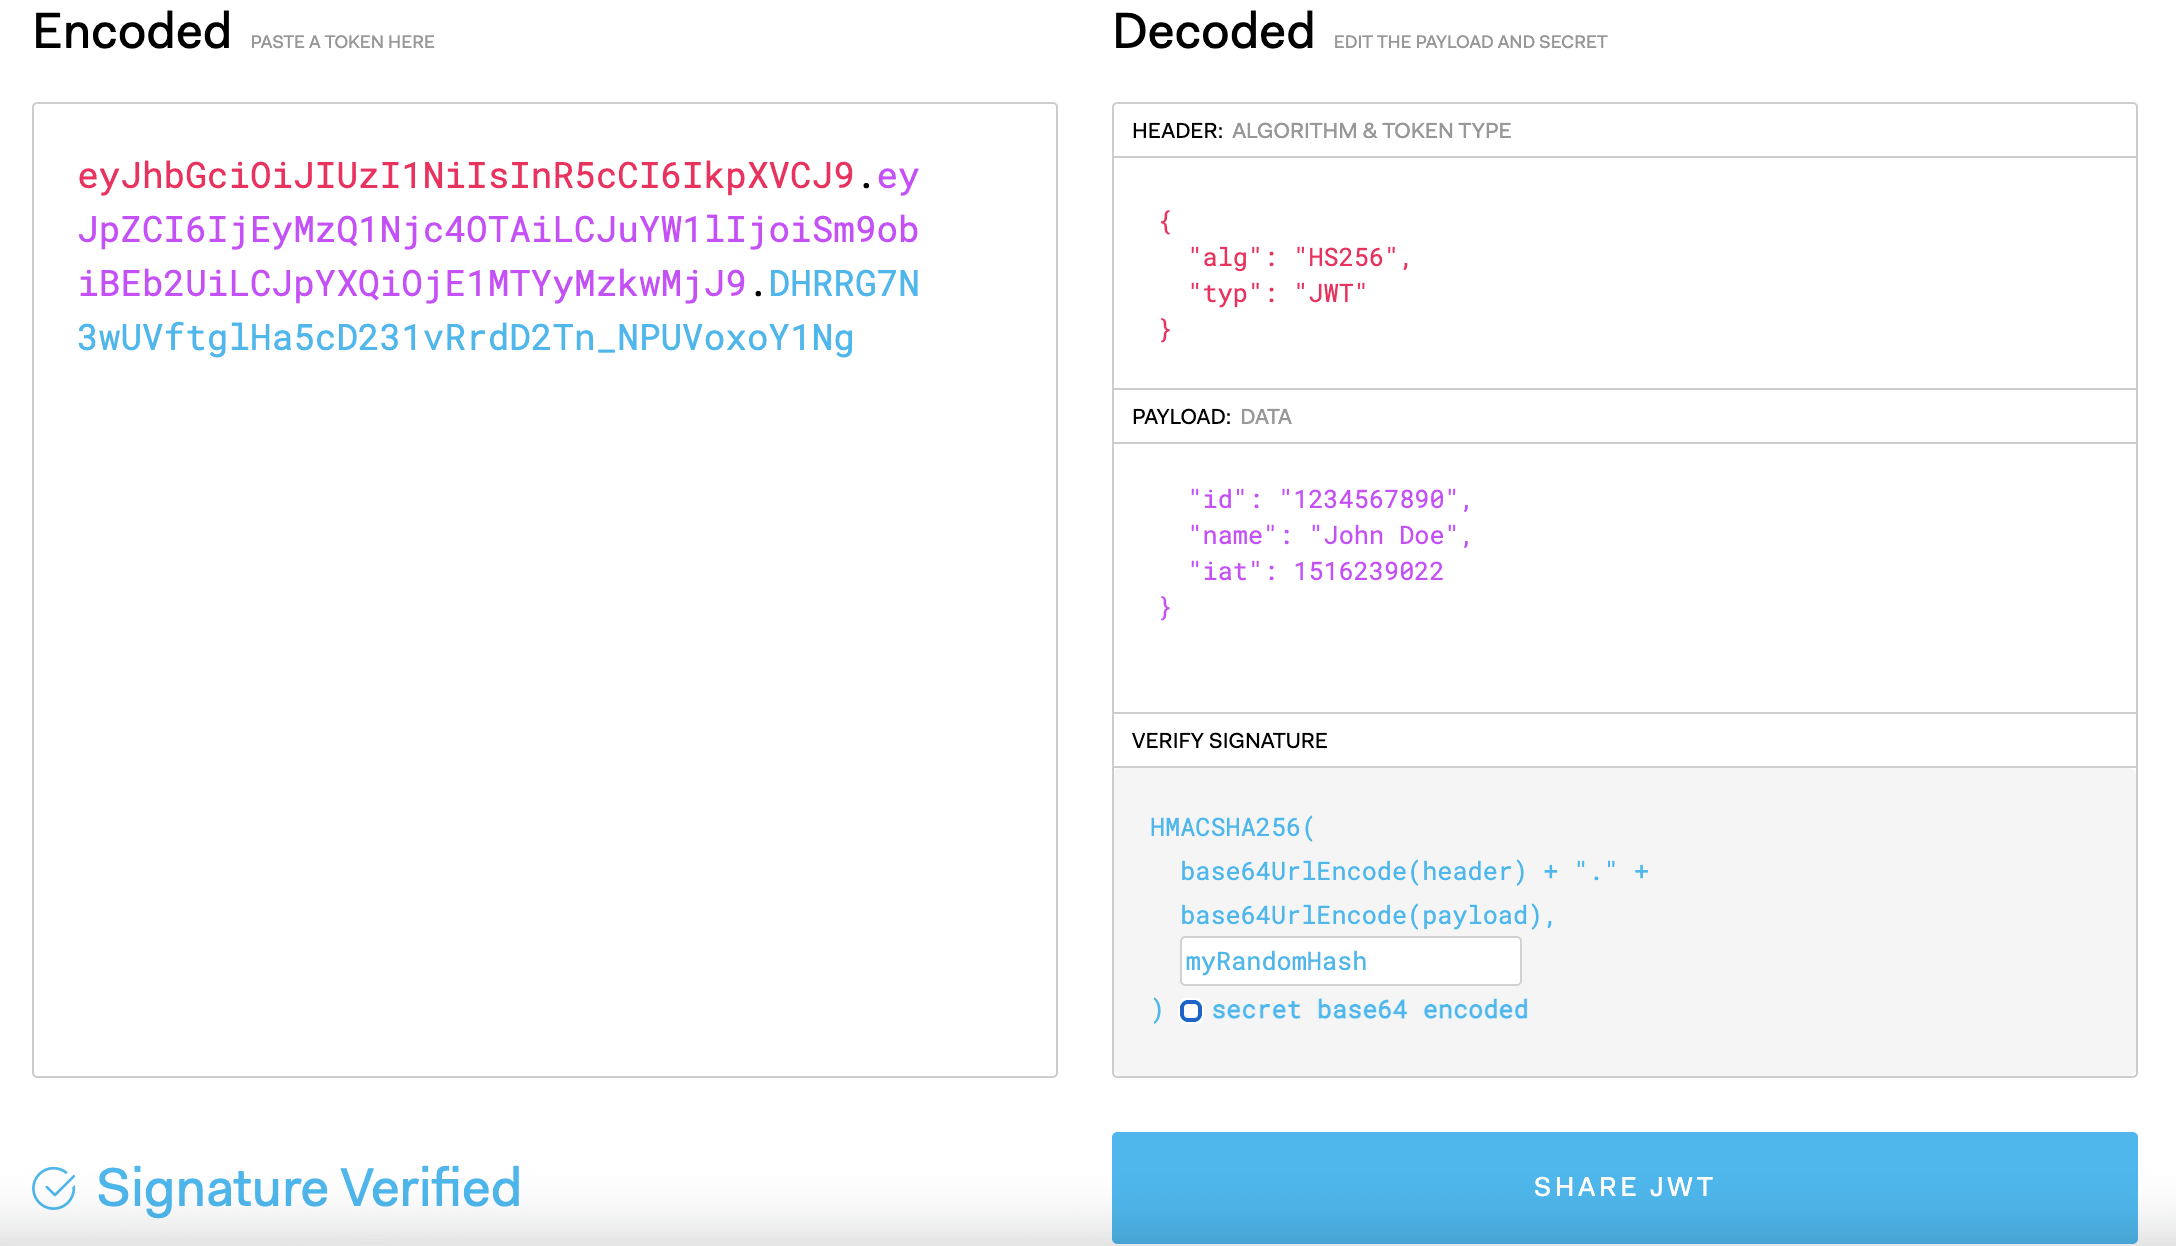 JWT website screenshot
Copy the encoded token from left box and paste it in the input box we just made above.
JWT website screenshot
Copy the encoded token from left box and paste it in the input box we just made above.

Handling token authentication in NodeJS
First, to validate and parse the JWT we need to install the module *jsonwebtoken *in our node project.
npm i jsonwebtoken --saveIn our Node index.js file, modify the io middleware like this.
const jwt = require('jsonwebtoken');

// jwt secret
const JWT_SECRET = 'myRandomHash';

io.use(async (socket, next) => {
  // fetch token from handshake auth sent by FE
  const token = socket.handshake.auth.token;
  try {
    // verify jwt token and get user data
    const user = await jwt.verify(token, JWT_SECRET);
    console.log('user', user);
    // save the user data into socket object, to be used further
    socket.user = user;
    next();
  } catch (e) {
    // if token is invalid, close connection
    console.log('error', e.message);
    return next(new Error(e.message));
  }
});
Here our middleware is verifying for the JWT token and extracting the user data, if the token is invalid or expired we throw an error and don't let the code move forward. We are also storing the user info into the socket object which would make our life easy when we have to extract the user info who sent the event in future events.
Now that we have our authentication and user information ready, let's create a simple UI for the chat messages and input box.
Creating the UI
Go to app.component.html file in your Angular project and paste the following code
<div class="App">
  <form [formGroup="tokenForm" (submit="submitToken()">
    <input type="text" placeholder="Enter token" formControlName="token" />
    <button type="submit">Submit</button>
  </form>
  <div class="box">
    <div class="messages"></div>
    <form
      [formGroup="messageForm"
      class="input-div"
      (submit="submitMessage()"
    >
      <input type="text" placeholder="Type in text" formControlName="message" />
      <button type="submit">Send</button>
    </form>
  </div>
</div>
In app.component.scss paste the following
.App {
  padding: 1rem;
}

.box {
  width: fit-content;
  height: 400px;
  border: solid 1px #000;
  display: flex;
  flex-direction: column;
  margin-top: 1rem;
}

.messages {
  flex-grow: 1;
}

.input-div {
  display: flex;
  width: 100%;
}
This code adds a box with a border which would be the chat box that shows the messages and an input container at the bottom for writing your message and sending it to the server.
Our page would like this with a box.
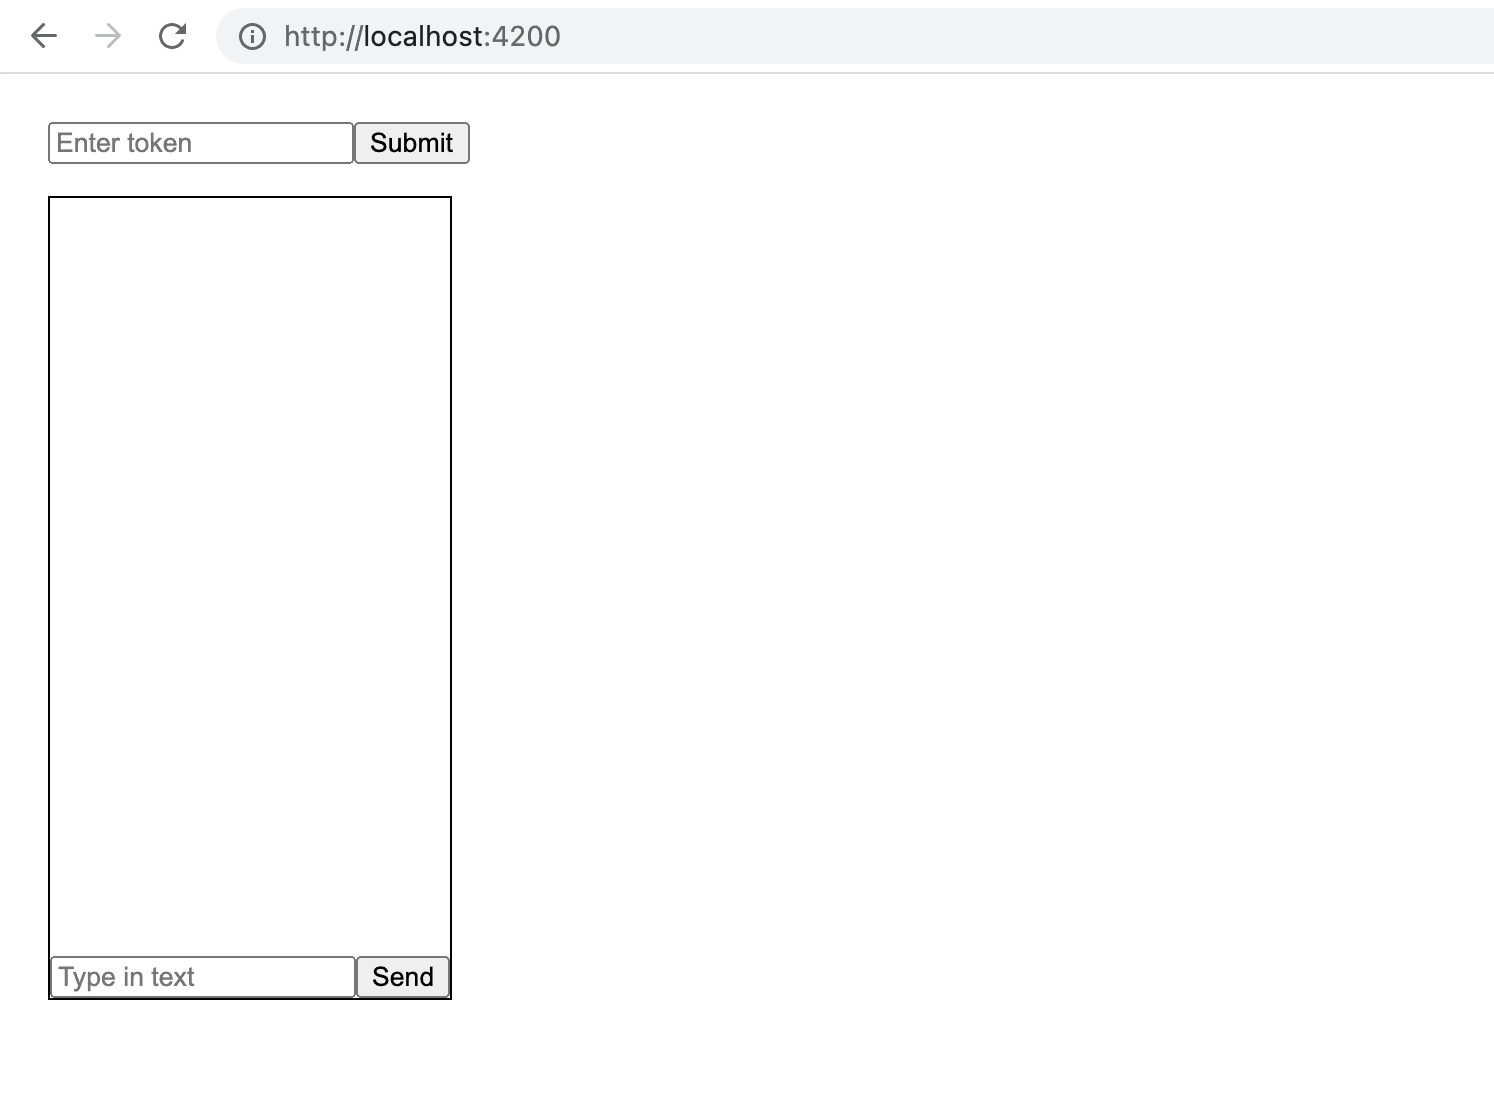 Page with chat box
Don't mind the UI, you can customize it in any way like.
Page with chat box
Don't mind the UI, you can customize it in any way like.
Sending a message
To send a message we need to add a method to handle the message submit on our form and fetch the current message written in the input field. Let's do the handling in app.component.ts file.
// chat room id, which will be dynamic in real world scenario
CHAT_ROOM = "myRandomChatRoomId";

messageForm = this.formBuilder.group({
  message: '',
});

submitToken() {
  const token = this.tokenForm.get('token').value;
  if (token) {
    this.socketService.setupSocketConnection(token);
    // add this line to handle incoming messages
    this.socketService.subscribeToMessages((err, data) => {
      console.log("NEW MESSAGE ", data);
    });
  }
}

submitMessage() {
  const message = this.messageForm.get('message').value;
  if (message) {
    this.socketService.sendMessage({message, roomName: this.CHAT_ROOM}, cb => {
      console.log("ACKNOWLEDGEMENT ", cb);
    });
  }
}
In socketio.service file
setupSocketConnection(token: string) {
  this.socket = io(environment.SOCKET_ENDPOINT, {
    auth: {
      token
    }
  });
}

// Handle message receive event
subscribeToMessages = (cb) => {
  if (!this.socket) return(true);
  this.socket.on('message', msg => {
    console.log('Room event received!');
    return cb(null, msg);
  });
}

sendMessage = ({message, roomName}, cb) => {
  if (this.socket) this.socket.emit('message', { message, roomName }, cb);
}
I have added a subscribeToMessages in submitToken which would listen to all incoming messages upon websocket connection.
The method submitMessage takes the value from message input and calls a sendMessage method on the socket service which emits the message to the server along with a callback which is forwarded to the server and used for acknowledgment by the server and the last param is the CHAT_ROOM id (declared on the top as a constant since this is just a demo) which would be used on the server to identify the room. Why? Let's understand.
User wants to communicate with another user or group of users
We have 2 users, one wants to send a message to the other user, they both would be in a channel which will be a unique identifier, and the same goes for group chat. So, when we send the message event to the server, the server would have to pass it on to the other users. But, how will the server know that the message is sent to which channel?
Purpose of CHANNEL ID
CHANNEL ID is the identifier that helps the server identify the channel. But, What will the server use it for? Now that we have the channel, the server has to send this message to each user in the channel, it can be 1 or 100.
So, to make it easy to publish all the events to those users, we will find all the participating channels of a connected user upon the io.on("connection") event and make the user socket instance join all those channels in loop. So, this eases the process of sending the message event to that channel id/room containing the relevant users without any overhead.
Let's do that on the server side
io.on("connection", (socket) => {
  // join user's own room
  socket.join(socket.user.id);
  console.log("a user connected");
  socket.on("disconnect", () => {
    console.log("user disconnected");
  });
  socket.on("my message", (msg) => {
    console.log("message: " + msg);
    io.emit("my broadcast", `server: ${msg}`);
  });

  socket.on("join", (roomName) => {
    console.log("join: " + roomName);
    socket.join(roomName);
  });

  socket.on("message", ({ message, roomName }) => {
    console.log("message: " + message + " in " + roomName);
    // send socket to all in room except sender
    socket.to(roomName).emit("message", message);
    callback({
      status: "ok"
    });
    // send to all including sender
    // io.to(roomName).emit("message", message);
  });
});
For demo purpose as I don't have a database connected so, I will make the socket join the static channel ID we defined above in Angular myRandomChatRoomId and do this under the socket.join in io.connection
socket.join('myRandomChatRoomId');This way all the users who connect will join a common channel which would trigger events for all the users if someone sends a message.
socket.leave(roomName)
Let's try this out opening two different tabs and generating two jwt's which impersonate two different users(I changed the name and id parameter in jwt.io website to impersonate two different users) and sending a message from one to see it being received by another.
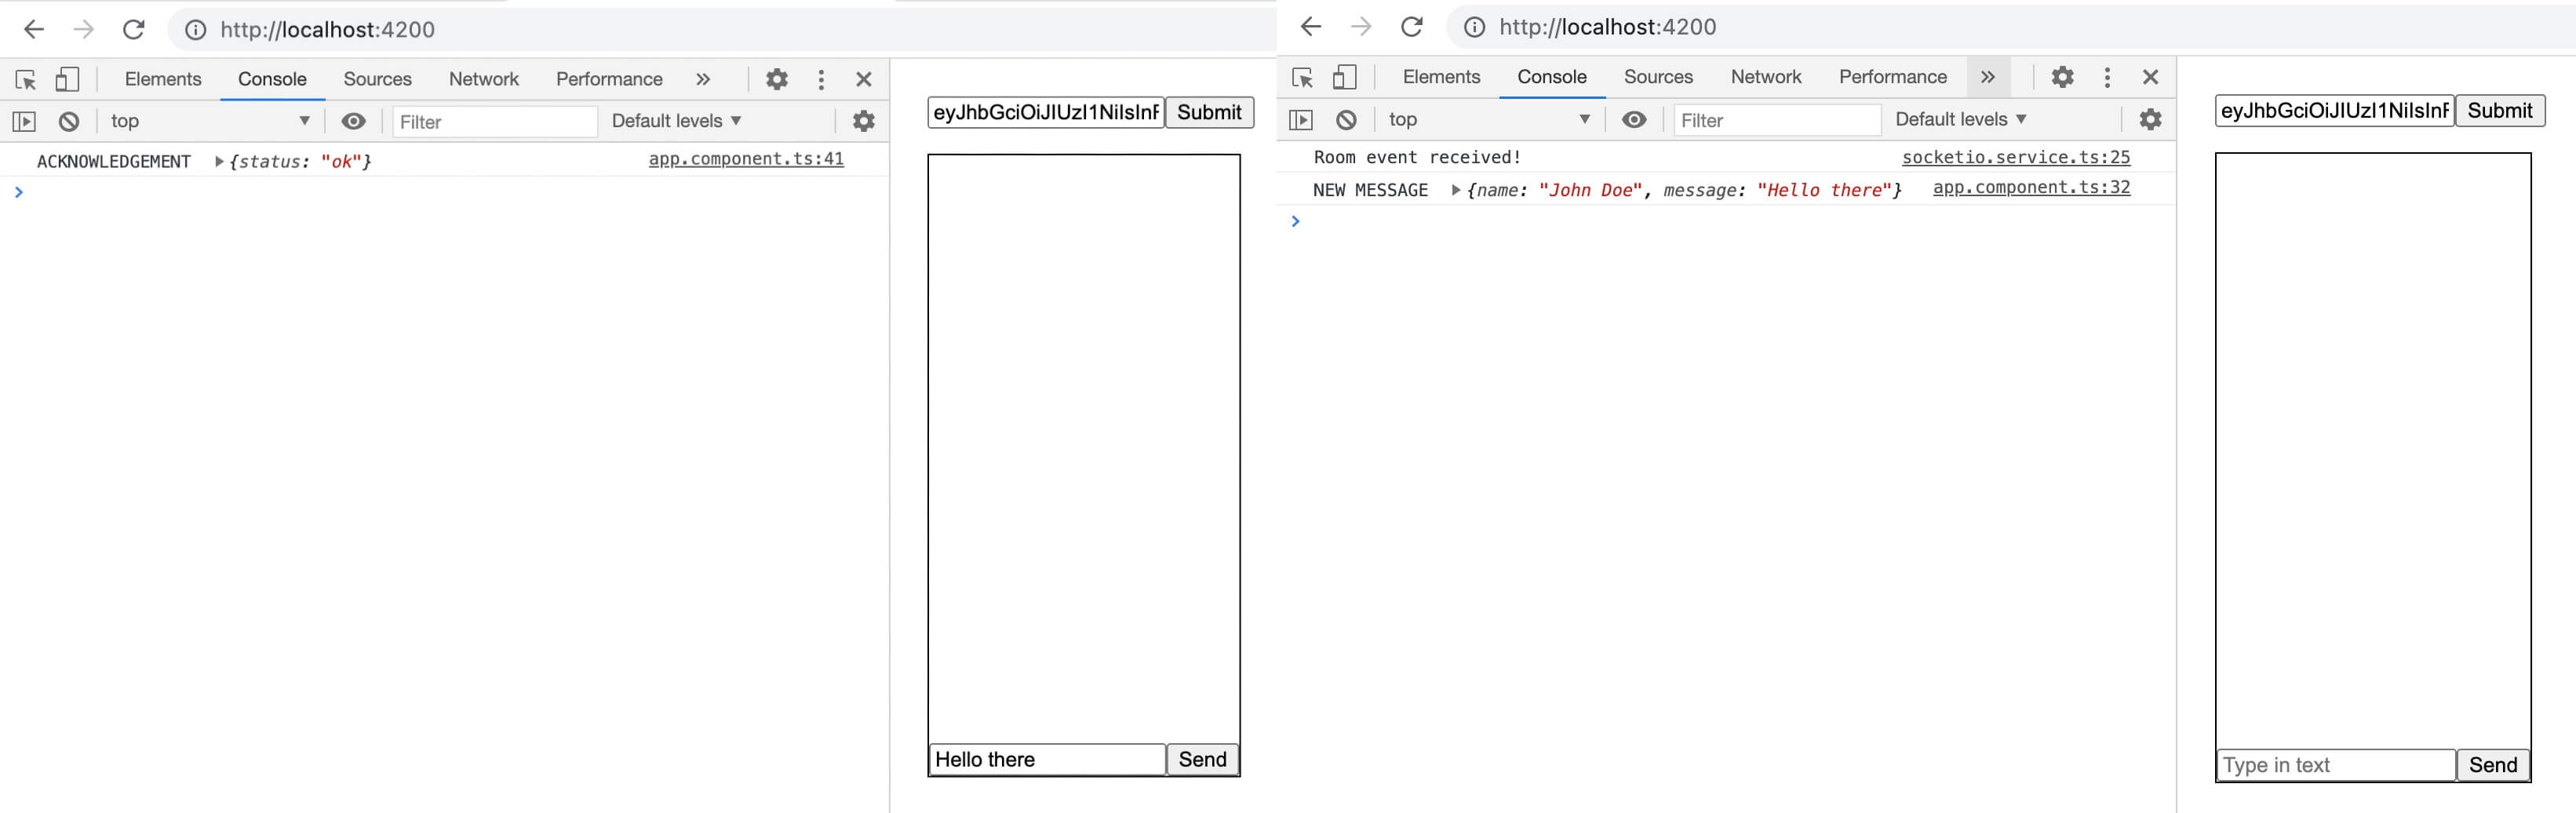 Message Received on Receiver
So, we receive the message here on one user and not on the sender as I have already explained above the way we are sending it to all in room except the sender.
Message Received on Receiver
So, we receive the message here on one user and not on the sender as I have already explained above the way we are sending it to all in room except the sender.
Congratulations, we have a running chat application. We just need to handle the message in the UI to append it to the box above our message input box.
Appending the incoming message
But first, we need to attach some information to the incoming message for the receiver to show names and differentiate between user ids. Let's see how can we do it.
On the backend in index.js file
socket.on('message', ({message, roomName}, callback) => {
  console.log("message: " + message + " in " + roomName);

  // generate data to send to receivers
  const outgoingMessage = {
    name: socket.user.name,
    id: socket.user.id,
    message,
  };
  // send socket to all in room except sender
  socket.to(roomName).emit("message", outgoingMessage);
  callback({
    status: "ok"
  });
  // send to all including sender
  // io.to(roomName).emit("message", message);
});
We append user data keys into the message sent to receivers so that it's easy for the to append it in the UI and perform actions based on user id.
Let's append the same into the box now.
In app.component.html file, let's handle the state for messages and append them, first handle the HTML
<div class="box">
  <div class="messages">
    <div *ngFor="let user of messages">{{user.name}}: {{user.message}}</div>
  </div>
  <form [formGroup="messageForm" class="input-div" (submit="submitMessage()">
    <input type="text" placeholder="Type in text" formControlName="message" />
    <button type="submit">Send</button>
  </form>
</div>
Put this inside the empty message class name div And now the logical part above the HTML, we update the following methods to handle the incoming message and also we clear the input on the sender and append the sender's message too into the box.
// static data only for demo purposes, in real world scenario, this would be already stored on client
const SENDER = {
  id: "123",
  name: "John Doe",
};

submitToken() {
  const token = this.tokenForm.get('token').value;
  if (token) {
    this.socketService.setupSocketConnection(token);
    this.socketService.subscribeToMessages((err, data) => {
      console.log("NEW MESSAGE ", data);
      this.messages = [...this.messages, data];
    });
  }
}

submitMessage() {
  const message = this.messageForm.get('message').value;
  if (message) {
    this.socketService.sendMessage({message, roomName: this.CHAT_ROOM}, cb => {
      console.log("ACKNOWLEDGEMENT ", cb);
    });
    this.messages = [
      ...this.messages,
      {
        message,
        ...SENDER,
      },
    ];
    // clear the input after the message is sent
    this.messageForm.reset();
  }
}
Let's run this now
 Incoming message from tab 1 user
There we go, we have the incoming message in the chat box and the same way the sender would have his message appended in the chat box.
Incoming message from tab 1 user
There we go, we have the incoming message in the chat box and the same way the sender would have his message appended in the chat box.
BONUS: Custom topics
We can also use the rooms for custom topics that a group of users wants to subscribe to, let's say football scores or product launches. Since they would be joined by a limited number of users, we can't use broadcast here.
We can achieve this by sending an event to the server that the client wants to join this room, or any other way the backend wants to do it since rooms can only be joined and left at the server side. For example, we can create a listener on the backend like
socket.on("join", (roomName) => {
  console.log("join: " + roomName);
  socket.join(roomName);
});
And emit the join event with a roomName from the client in socket.service.js
joinRoom = (roomName) => {
  this.socket.emit('join', roomName);
}
And, call the joinRoom inside our app.component.ts with a roomName specified.
You can check all of the above written example code at my github
This concludes my article about collaborating multiple users with the concept of Rooms and socket.io . I have covered every aspect from authentication to rooms and sending messages to others. We will talk about adding a database(Firebase or MongoDB), scaling the server to multiple instances by using Socket.io Redis Adapter in the future articles. All of this information cannot be covered in a single article.
Liked my work. Buy me a coffee.
Do write down your reviews or send in a mail from the contact form if you have any doubts and do remember to subscribe for more content like this.